Essential Tips for Flooring Installation Your Flooring Tips Guide
- easyflooring
- Apr 17
- 4 min read

Installing flooring is a craft that demands precision, patience, and the right approach. Whether you’re working with ceramic, porcelain, marble, or large-format tiles, the goal is always the same: a flawless, level finish that stands the test of time. I’ve gathered some essential tips to help you master the process and avoid common pitfalls. Let’s dive into this flooring tips guide that will boost your efficiency and quality on every job.
Preparing Your Surface for Success: The First Step in Your Flooring Tips Guide
Before you even open the box of tiles, preparation is key. A clean, level, and stable surface sets the foundation for a perfect installation. Here’s what I focus on:
Clean thoroughly: Remove all dust, dirt, grease, and old adhesive. Even tiny debris can cause unevenness.
Check for level: Use a laser level or straight edge to identify any dips or bumps. Floors should be flat within 1/8 inch over 10 feet.
Repair and patch: Fill cracks and holes with a suitable patching compound. Let it dry completely.
Moisture test: Especially for concrete slabs, test for moisture to avoid future tile lifting or mold issues.
Taking these steps seriously saves you from callbacks and rework. Trust me, a well-prepped floor is half the job done!

Choosing the Right Tools and Materials for a Smooth Installation
The right tools make all the difference. I always recommend investing in quality equipment and materials tailored to your project’s needs. Here’s my checklist:
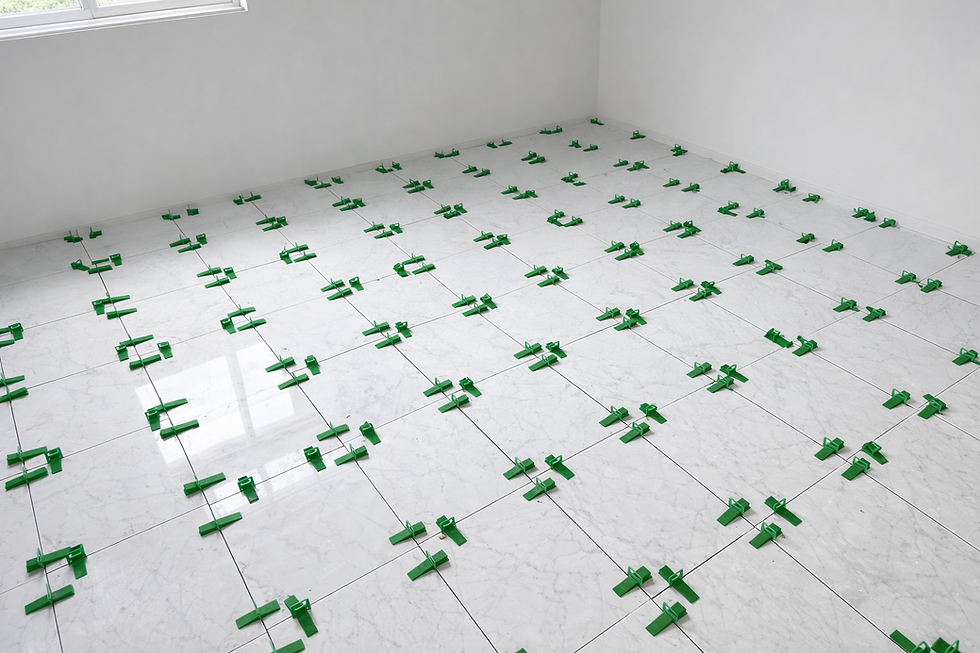
Tile leveling system: Using a professional tile leveling system like EASY LEVEL ensures zero lippage and tight grout joints. It speeds up the process and guarantees a clean finish.
Notched trowel: Select the correct notch size based on tile size and substrate.
Tile cutter or wet saw: For precise cuts, especially with large-format tiles.
Rubber mallet and spacers: To gently tap tiles into place and maintain consistent spacing.
Measuring tools: Tape measure, chalk line, and laser level for accuracy.
Remember, the right clip sizes are crucial when working with thick or large tiles. EASY LEVEL offers a wide range of clip sizes up to 35mm (1 3/8"), perfect for heavy-duty materials like marble and travertine.
Mastering the Layout: Plan Before You Place
A smart layout saves time and materials. I always start by measuring the room and planning the tile placement to minimize cuts and avoid awkward slivers at edges. Here’s how I approach it:
Find the center: Snap chalk lines to mark the center of the room both ways.
Dry lay tiles: Lay out a row of tiles along the center lines without adhesive to see how they fit.
Adjust for balance: Shift the layout so cut tiles at edges are at least half the tile width.
Mark reference lines: These will guide your installation and keep tiles straight.
This step might seem slow, but it prevents costly mistakes and ensures a professional look.

Applying Adhesive and Setting Tiles: Precision is Everything
When it’s time to spread adhesive and set tiles, speed and accuracy are your best friends. Here’s my method:
Mix adhesive properly: Follow manufacturer instructions for consistency.
Spread with the right trowel: Hold at a 45-degree angle and apply evenly.
Back butter large tiles: For better adhesion, apply a thin layer of adhesive on the tile back.
Use leveling clips and wedges: Insert clips under tiles and tighten wedges to eliminate lippage.
Work in small sections: This prevents adhesive from drying before tiles are set.
Check alignment frequently: Use a level and straight edge to keep tiles flat and aligned.
This is where flooring installation tips really come into play. Using a professional leveling system reduces physical strain and speeds up the process, especially on large projects.
Grouting and Finishing Touches: Seal the Deal
Once the adhesive cures, it’s time to grout and finish the job. Here’s how I ensure a clean, durable finish:
Choose the right grout: For narrow joints, use unsanded grout; for wider joints, sanded grout is best.
Mix grout to a creamy consistency: Avoid lumps for easy application.
Apply with a rubber float: Press grout diagonally into joints to fill completely.
Clean excess grout quickly: Use a damp sponge and rinse frequently.
Seal grout lines: After curing, apply a grout sealer to protect against stains and moisture.
Final inspection: Check for any chips, gaps, or uneven grout and fix immediately.
Taking your time with grouting ensures the floor looks flawless and lasts longer.
Keep Your Workflow Efficient and Consistent
In high-volume installations, consistency is king. I rely on systems and routines that keep the team moving smoothly:
Pre-cut tiles: Prepare cuts before starting to avoid delays.
Organize materials: Keep clips, wedges, and tools within easy reach.
Train your crew: Everyone should know the process and quality standards.
Use reliable suppliers: Fast delivery and product availability prevent downtime.
EASY LEVEL’s same-day shipping and wide clip range help maintain momentum on the job site. When you have the right products and a solid plan, you finish faster with fewer issues.
Flooring installation is a skill that combines art and science. With these essential tips, you can tackle any project confidently, delivering perfect results every time. Remember, preparation, the right tools, smart layout, precise setting, and careful finishing are your keys to success. Keep these in mind, and your floors will impress clients and stand strong for years to come!


Comments